Showing posts with label renovating. Show all posts

Tuesday, 20 October 2015

Toy Grocery Shop Restoration Project

Several months ago I wrote a post about my two restoration projects for Number Three's birthday. Unfortunately only one of them, the rocking horse, was completed in time. The other, the little old-fashioned shop, remains in the garage and makes my conscience cringe with guilt every time I see it sitting there unfinished. Bad mother, bad, bad mother!
 I was full of good intentions. Back in May I bought and applied paint stripper, only to see that the paint that was used on it is somehow resistant to paint stripper. Instead of blistering and flaking, the paint turned to a slimey goo and simply would not come off. Scraping at it only made it worse.


Disheartened by this, I turned my full attention to the rocking horse and put the problem paint out of my mind. 

Now that the horse is finished, I really have to get cracking on the shop so that it is finished by Christmas. In a recent fit of enthusiasm I ordered some chalk paint online and clicked on to Pinterest to assist in finalising the ideas that I have in mind for how the shop should look.

The paint has arrived and I am really pleased with the colours, Larch, Snow and Ocean, all by Quick. It remains to be seen how well they will adhere to the strange paint that the shop was painted with. I haven't used this brand before.
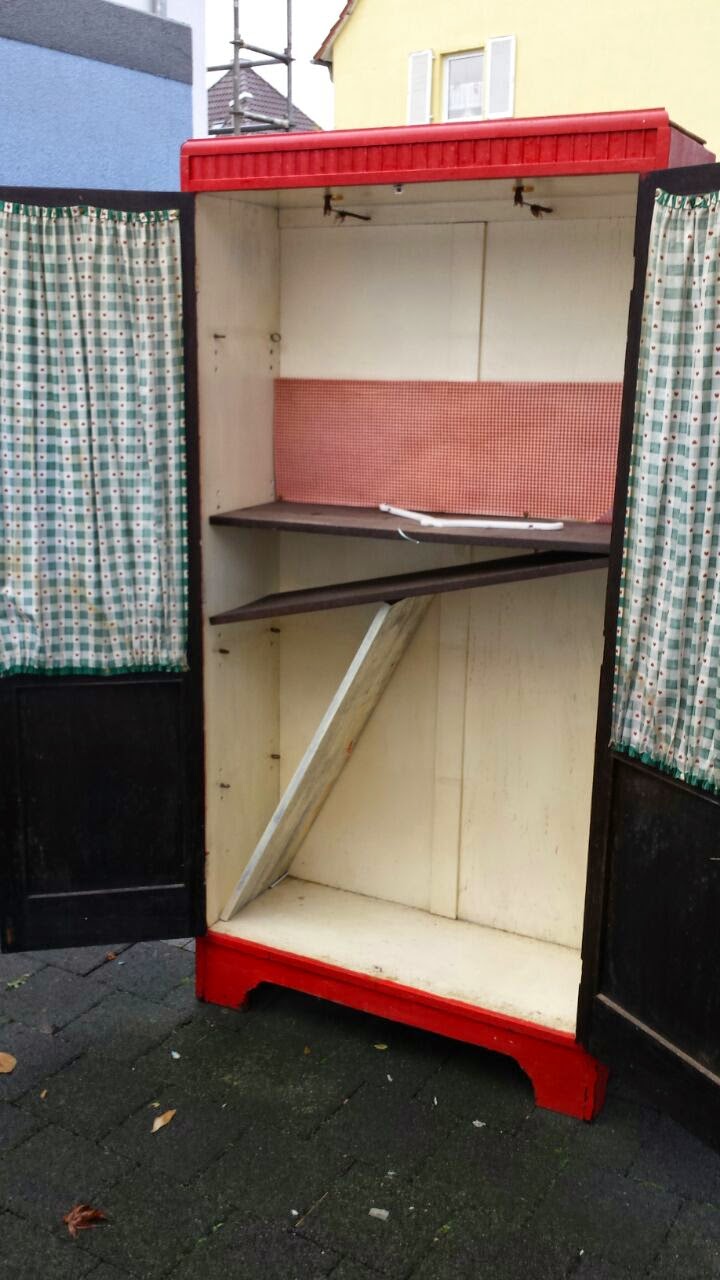
As for the design of the shop, I think I will use Snow as the background colour and add the detail and signage in Larch green and Ocean blue. That should, I hope, give it a nice, fresh look as well as letting it blend in well, regardless of whether the shop ends up being housed in Number Three's bedroom or in the playroom.


In order to personalise the shop for Number Three, I intend to stencil retro lettering on the front panel, hence the many shop signs on my Pinterest board. Currently I think I may go with something along the lines of this.
So please keep your fingers crossed that I will somehow find the time to get the sandpaper, brushes and paints out so that Number Three can set up shop in time for the new year. 


Home Etc

[Disclaimer: This is not a sponsored post. I bought and paid for the paints myself. I was not asked to write this post. All photos, text and opinions are my own]

Tuesday, 8 September 2015

Horsey, horsey, don't you stop....

Back in May, I announced my intention to renovate a shabby, wobbly old nag of a rocking horse as a present for Number Three's first birthday. I was full of inspiration and enthusiasm and had a baby who slept for about 90 minutes mid-morning, so I got off to a good start.

 But in mid-July, almost overnight, my baby became a toddler, sleeping less, starting to walk and generally scuppering his mammy's grand plans. So poor horsey lay in pieces in the shed, stripped of his old red plastic, sanded down and wood-glued in places, waiting for the day when he would get his long-promised make-over.
As Number Three's birthday loomed, I struggled to recapture my enthusiasm and get back to work. Just as I had begun again, Number One got sick and my time was limited again. 

So his birthday came and went. He got a book instead of a rocking horse. He felt rotten because of his fever and I felt terrible that my good intentions had come to nothing. 

Eventually, after a couple of days I got a burst of creative energy. I pulled a few night shifts and enlisted the help of The Bavarian, Number One and Number Two in design matters. Between us we agreed on a colour scheme. I gave the whole horse a second coat, painted the face details, covered the seat and plaited the reins. 


Just under a week after Number Three turned one, his present is finally ready and I cannot wait to see his reaction.


If you enjoyed this, why not pin it? 


Home Etc

Tuesday, 10 March 2015

Cradle Renovation Tutorial


This cradle is another of my salvaged items. It was out for the rubbish collection in June 2010. I was pregnant with Number 2 at the time and didn't know whether I was having a boy or a girl. As soon as I saw the cradle I fell in love with the heart-shaped cut-outs and the contours of the rockers. 
As it happened, I had a second son and a few months ago a third one. So renovating this particular item was not top of my list of priorities. It got used occasionally as a bed for the boys' teddies and even for a while as a storage box for the growing pile of Lego we have in our house. But eventually last year it was rejected. Heart shapes are not big with 6 and 4 year old boys.
As luck would have it, my new niece arrived into the world around the same time as the cradle fell from favour. If ever I needed motivation to finally do up my cradle, this was it. 
The cradle before sanding
Step 1: As with any renovation, check which parts are removable then clean the whole thing. In this case I only needed to use a damp cloth to wipe down the surface. The only removable part is the base.
Step 2: I decided that the base should be padded and covered to look like it has a mattress and sheet. Two pieces of double-sided sticky tape were sufficient to hold the wadding in place. That was then covered with a rectangle of pale yellow cotton, cut to approx. 10 cm wider and longer than the base itself. I stapled the material into place on the underside of the base with a staple gun (NOVUS J-08 XX) 
Wadding
Covered base, upper side
Covered base, underside


 Step 3: Sand and paint the cradle. Make sure to remove all dust from the sanding with a damp cloth and let the wood dry properly before painting. I used two coats of white undercoat to cover the dark wood. After that I added two coats of ivory paint, making sure to check at the DIY shop that the paint was both hard-wearing and child-friendly.


Step 4: Now comes the hard part - the pattern. I had a book as inspiration and tricked around with designs on paper before deciding on the style, size and colours I would use. I highly recommend that you take your time and try out a few different colour schemes before working on the actual piece of furniture you are renovating. 


My inspiration
Step 5: Transferring your design from paper to furniture. For this step I used the good old-fashioned paper and pencil rubbing method. Basically, you draw your design onto paper and use a soft pencil to go over it a few times. Then place the paper, drawing side down, onto the furniture. Use your pencil to rub firmly over the design on the paper (see photos below). You may want to use masking tape to attach the paper to the furniture to avoid the paper slipping. When you lift the paper, you should be able to see the outline of the design on the painted surface of the furniture.


The transferred design at the bottom on the cradle
Step 6: Painting over the transfer. Take your time with painting your design. I tend rowards impatience and have learned from mistakes made in the past that it is better to go slowly and get your artwork right on the first attempt. Of course small errors or bleeding colours can mostly be recified but patience really does play a central role here. 

Cradle standing on one end so that the other end can be painted.
Close up detail around the heart cut-out
Practice your design on paper


Inspiration from a book I bought at in an antique bookshop


A close-up of the design I painted


The finished cradle complete with hand-sewn pillow and duvet
Detail around the heart-shaped cut-out

Home Etc

Sunday, 8 February 2015

Family Breakfast & DIY Sunday


After the many disturbances I had last night, I was so pleased to have a little time to myself this morning as The Bavarian and Number 3 slept and the boys played. At 8.07am I turned on the oven and at 9.15am we sat down to breakfast together - homemade jams, sweet bread and butter.  

After breaksfast, we began our DIY Sunday. The Bavarian finished off the bathroom (photos of this large project will follow) and I put the finishing touches to our shoe closet.

Before - Tattered and shabby but with potential
 

I spotted this tattered old closet at the beginning of December. Someone was dumping it in the annual Sperrmuell collection and I couldn't resist it. Despite the rain and no-one to help me load it into the car, I managed to get it home. Over the past two weeks I have been sanding, painting, polishing and stapling and today I finally finished it off. I am delighted with how it turned out and even more delighted that our cluttered little cloakroom has now been relieved of some of its contents. 

Inside  - a sensor light
and lots of room  for shoes
After - looking pretty in
smokey blue, with new fabric
and polished handles