Thursday, 1 December 2016

Pine Cone Christmas Crafts For Children

Last year our kindergarten made these cute little pine cone angels and Christmas trees with the children and hung them in the windows. The are so simple that toddlers can make them and are fun to decorate.


You will need:
Pine cones (obviously!)
Paint
Beads
Glue
Glitter in silver, gold or red
Ribbon or coloured string
Small wooden or polystyrene balls
Gold doilies

For the Christmas Trees:
Paint the pine cones with green paint. While the paint is still wet, sprinkle the tips with glitter. 
Leave to dry then glue coloured beads onto the tips as the baubles. 
Finish by glueing or tying a lenth of coloured string or ribbon to the top so that you can hang your decoration.

For the Angels:
Holding the pine cone flat side up, dab the tips with coloured glitter glue or with glue and sprinkle with glitter. You may want to balance the pine cone in a small cup to keep it steady and allow you to use both hands.
Draw a face onto the wooden or polystyrene ball and glue it to the centre of the flat surface, as in the photo. Next cut some lengths of wool, string or ribbon for the hair and glue it in place. 
Fold the doilie into quarters and then cut out two quarters. Glue them to the back of the angel, gold side facing outwards. 
Finish by glueing or tying a lenth of coloured string or ribbon to the angel so that you can hang your decoration.


Saturday, 26 November 2016

A Festive Jar Of Walnuts


This is a simple but very effective way to brighten up a shelf, ledge, mantelpiece or windowsill for the festive season. 

Just fill a kilner jar with walnuts (pine cones or chesttnuts would work either), tie a gingham ribbon round the neck of the jar and place it on a surface with a backdrop of holly, ivy and other greenery of your choice.

Tuesday, 8 March 2016

We've Moved!

Hello lovely readers,

Thos of you who follow me on Twitter, Instagram or anywhere else may already have noticed this, but for those who haven't, WE'VE MOVED!

Yes, the blog has migrated to Wordpress and has a nice short address now

Please do pop over there and have a look at the new design. All the old posts and images have migrated too, so you won't be missing anything.

Looking forward to welcoming you at threesonslater.com!


Fionnuala & the boys x

Sunday, 6 March 2016

Counting Down To Easter With Kids - Coffee Filter Bunnies


Over the last few years I have seen these coffee filter Easter bunnies made by our kindergarten kids and by the school children at our primary school too. I find them really cute and they are quite simple to make. 

When making these with small children, your best bet is to draw and cut out all the pieces first before getting the children involved. Thier patience probably won't stretch to watching you prepare the paper shapes.

For older children (4 years and upwards), let them draw their own rabbit ears, head and paws. They will probably need help with the eggs and the basket. 

What you'll need for this activity is:
Paper or card in various colours - brown, beige or grey for the rabbit fur, pink or white for inside the ears, brown for the basket and whatever colours you like for the eggs.
A pencil for drawing with
A black felt tip pen for drawing the face
A scissors for cutting out with
Glue for sticking 
A coffee filter (or some card or wallpaper cut to the right shape) for the body


Step 1: Draw the head, paws, feet and ears on the colour of card you will be using for the bunny's fur, as shown in the photo above. Then cut them out.

Step 2: Draw the inner pieces of the ears and a little heart shape for the nose onto another colour of card and cut them out.

Step 3: Draw the basket (a circle with a smaller semicircle cut out of it) and some eggs and cut them out. The eggs look very pretty is you cut them out of patterned paper.

Step 4: Assemble all the parts, as shown in the photo below.


Step 5: Before gluing the parts to the coffee filter, draw a face onto the bunny and draw two short strokes on each of the paws, as shown in the photos below.


Step 6: Draw a woven pattern onto the basket, as shown in the photo below. Then turn the basket over and stick the eggs in place.


Step 7: Glue all of the parts together. Now your bunny should look something like the one in this photo.


Step 8: Now you can decide what to do with your bunny. They look quite nice as a window display, attached to the window with tack or double-sided sticky tape. 

Alternatively you can stand your bunny up by cutting a toilet roll insert in half and placing the open coffee filter over it. 


Now your bunny is finished and ready for Easter to arrive. 


Thursday, 3 March 2016

Counting Down To Easter With Kids: Grow Your Own Easter Grass

You know when you look on Pinterest or in a magazine and you see beautiful Easer displays with lush-looking, thick grass? And you think, doesn't that loook gorgeous? And then you look outside and see the miserable excuse for a lawn that your children have trodden to bits? And you sigh and flick to the next page, looking for inspiration for decorations you are more likely to be able to reproduce for Easter Sunday and that you could maybe involve the kids in?

Well stop right there. Here is how you can grow your own lush and juicy looking grass in just two weeks with very little effort. In fact, you can get your children to do it for you, it is that simple. And it grows so quickly, they will love how they can almost watch it grow, hour by hour.

Here's  what you need:
Water
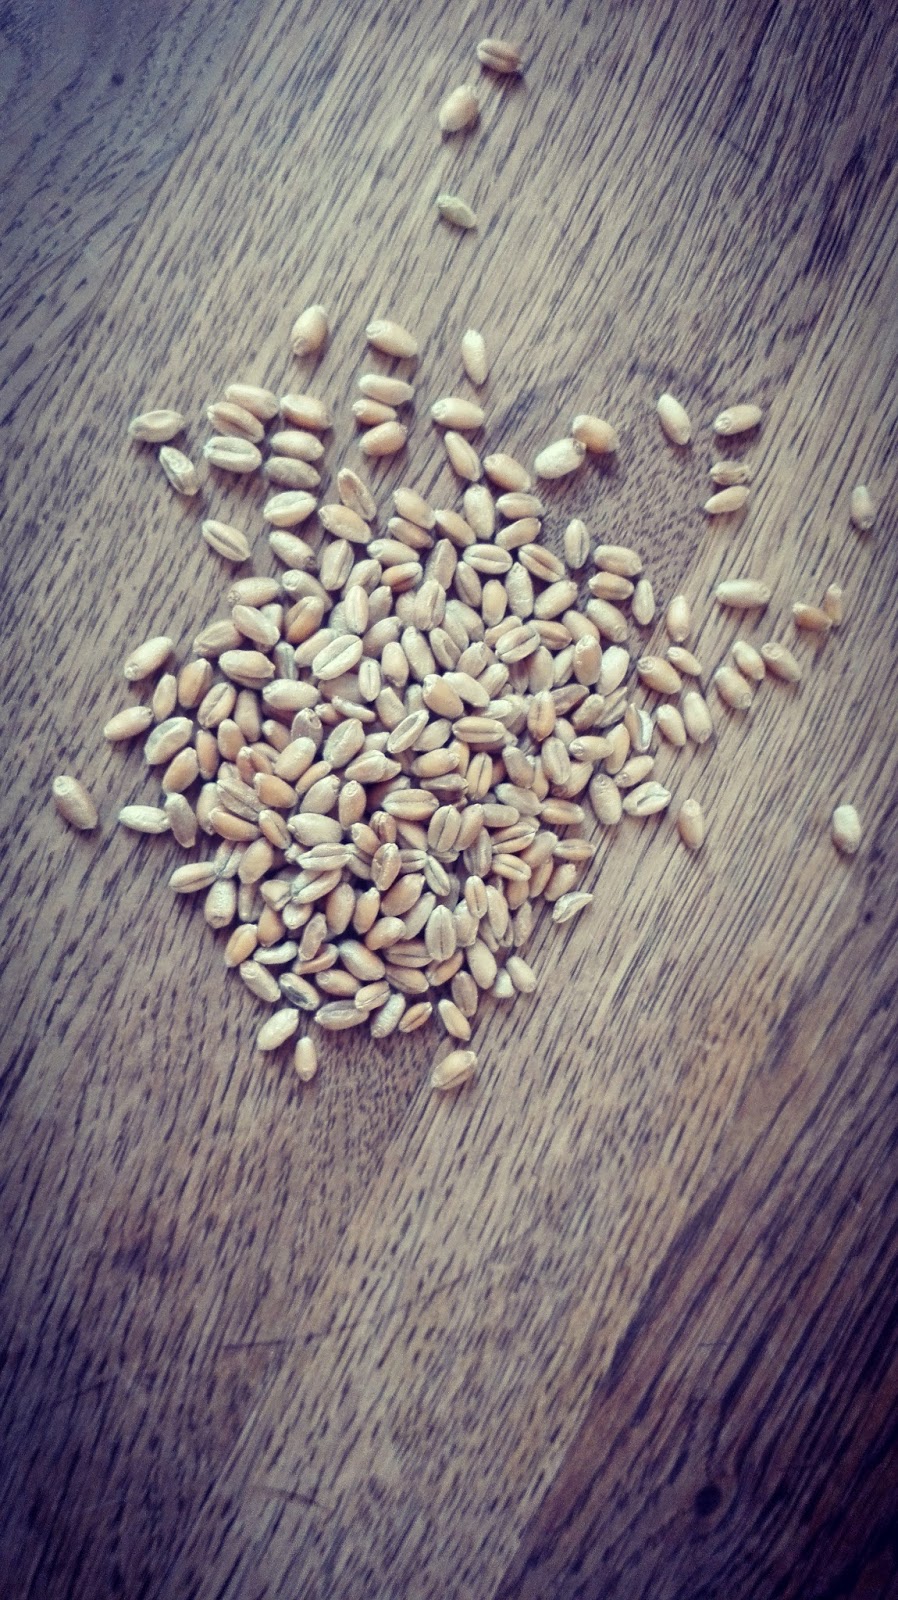
Wheat grains (the kind brown bread is made from, but whole not shredded. You should be able to get them in a wholefood shop or a garden center)
A flat-bottomed container, preferably shallow or made of glass (I'll explain why further on)


Wheat grains like these are what you need to start your grass off. Don't be concerned that they are dry. So are cress seeds or any other seeds you buy. The wheat grains I used were bought in October and, in our house at least, usually get milled and and added to brown bread when I bake it. They have worked perfectly for grass.


Day 1: Place a layer of grains into a wide, flat-bottomed dish. Water the grains with just enough water to dampen them. Keep the dish somewhere where it gets lots of light. I keep ours on the landing under the skylight.

The reason you need a shallow or glass dish is to allow plenty of light to get to the grains to allow them to germinate and grow.

It doesn't have to be the dish that you intend using to display the grass in when it is grown. Once the grains extend roots, the roots intertwine and form a base beneath the grass stems.

Day 2-3: Water with just enough water to dampen the grains. Keep an eye on them to make sure that they don't dry out completely. The first of the grains will start to sprout. 

Day 4-7: By now most of the grains should have sprouted and the blades of grass will grow quite rapidly. Keep watering the grass daily with a small amount of water.


Day 8-10: By this stage the grass should look something like the photos below. Keep watering.


Day 11-14: By the time two weeks have passed, your Easter grass should be looking long and thick, and be a nice bright shade of green.

All that remains to be done is decide on how to decorate. Adding little chicks, foil-wrapped chocolate bunnies, painted or dyed eggs, snowdrops or miniature daffodils are some pretty ideas you could try.

I'll be posting more photos as and when I set up my own decorations. But for now here's a sneak peak at a version I was working on the other day. 


You Baby Me Mummy

Sunday, 28 February 2016

It's Not So Bad Really, Gardening

This weekend we've done a big clear up in the garden. During Autumn all our time was taken up with raking leaves and picking up fallen walnuts, so we never got round to tidying the garden before the weather got bad. 

The combination of a dry weekend and having no plans led to us deciding yesterday morning that we would attack the garden. Literally attack it. We have been hacking away at bushes and trees as well as burning off-cuts of heather and sage. 

I am no garden expert. I wouldn't even say that I particularly like gardening, but I do love being in the garden. And the work does give me feeling of having done something good and useful. 

Breaking for a cup of coffee to be drunk outdoors while reviewing the work done and to be done. Holding an impromptu picnic by the pond, wrapped up in our wellies and fleeces. It feels so good. It tastes so good.


The nest Number One built with bits
and pieces found in the garden today.
Yesterday while cutting back lavender and sage and ripping out dried up marjoram, I enjoyed the scent they gave off and left on my hands. Raking up walnut shells and leaves revealed vibrant green moss beneath. The clumps that got stuck in the prongs of the rake got set aside for decorating with and for the children to play with. 

That's another one of the things about the garden that makes me happy - us all being together, but doing our own thing. Working, playing, getting creative or just sitting down for a snack outside. Easy, unforced, old-fashioned family time.


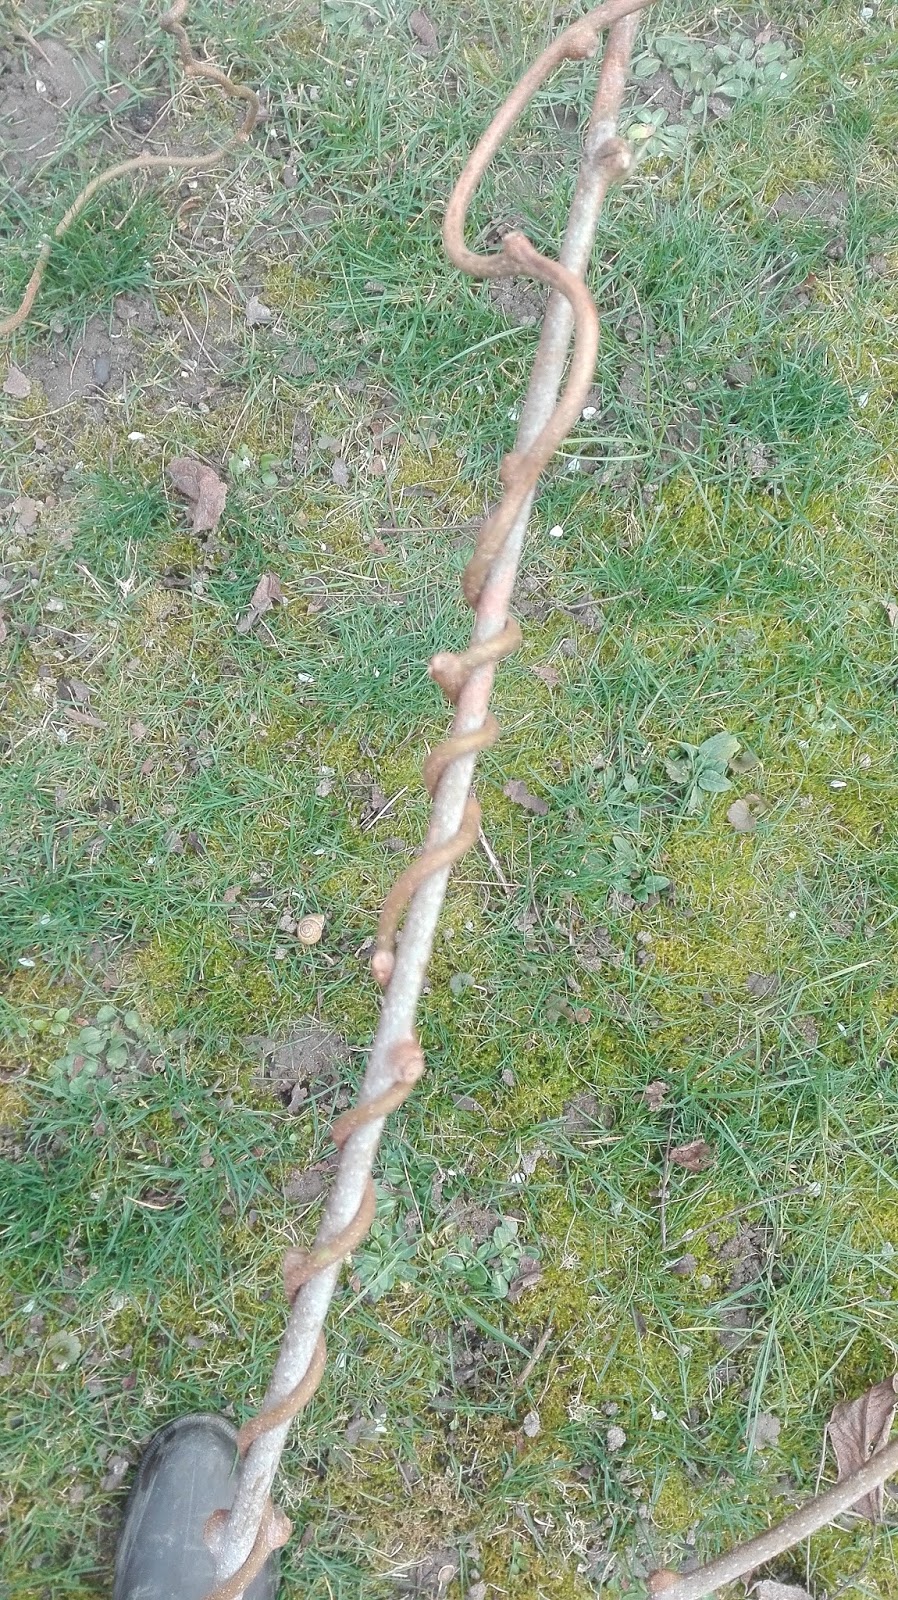
As the Bavarian chopped branches off the kiwi tree in an attempt to tame it (it grows 4m long tentacles in summer), I gathered up the ones that had become intwined in one another and separated them, carefully twisting them apart and ending up with curly wurly lengths of branch, perfect for a wreath or some Easter decorations. 

Ah, full days outdoors, at last.  

I suppose it is not so bad after all, gardening. 

----------------------------------------------------------

For more snaps and stories, follow me on Instagram (@three_sons_later)

Friday, 26 February 2016

A Day For Making Plans


It is a day for making plans and lists. I have decided that just now. When things are going wrong, the best thing to do is try make them better. 


For weeks now, life just hasn't been right. It is never going to be perfect, even through there are perfect days now and again. But lately it hasn't even been particularly good.
 
There are the small things, like the weather being miserable. Not proper Winter and not proper Spring. Snow falling but not sticking. The sun coming out but disappearing before we get our shoes on to go outside. I can't change that. No one can. 

Then there are the bigger things. The worse than usual fights and arguments between the children. The struggles between us and the children. Not just the ordinary ones, like having to ask five times before they put their shoes on. I mean the struggles where you as a parent come across as the bad guy ALL the time and there seems to no logical explanation. 

The sulking kids, the crying, whingeing, complaining and storming off. The door slamming. The "I hate you" s and "You don't even like me" s. The "I'm not eating that" and the "I won't do what you tell me. I am the boss of me". 

It is tiring and draining and hurtful. I know they don't mean it to be. But it gets to you, you know?. 

So today is a day for plans and lists. We're looking at what we need to change to be happy again. A list for each of us and a family list. I'm hoping that there will be some easy fixes and I know there will be some big things too. 

Number One is getting older and more independent. He needs to feel he can choose things for himself and we have to find ways to let him do that. We are not prepared to push out the boundaries as far as he wants us too but hopefully we can compromise.

Number Two has grown so much so quickly that we easily forget he is only five. We expect too much of him and that has to change too. He still needs us a lot. He needs individual attention and more focus on him and what he wants.

Number Three is galloping towards little boyhood at an astounding rate. A Christmas he was still a baby. A walking, climbing, babbling baby, but a baby nonetheless. Now, turning 18 months old next week, he is most definitely a toddler, demanding attention, shouting out words and taking only one nap a day. We have to adapt to his changing needs also.

So, wallowing in self-pity is banned and positive, life-changing plans are getting made. Will they work? Who knows. Is it worth a try? Yes.

The Toddler's Guide To Successful Toddlering

If you are reading this, you are probably between 10 and 36 months old and are doubting your potential to be a successful toddler. 

Let me guess? You see other toddlers throw themselves on the ground and behave as if the end of the world is nigh only to be scooped up moments later by a parent or minder and given the thing they want? You want that too but you haven't been able to achieve it? You parents are not driven entirely crazy by your behaviour but all your friends' parents are losing the plot?

Don't worry. You can do it too. By following these simple rules, you can reach your potential before it is too late. 

1. There is no phase: We've all heard the muttering between parents when their toddlers seem impossible to manage, "It is just a phase". Don't let them fool you. There is no phase. YOU are in charge. YOU have the power to decide whether or not you get what you want out of todderhood.

2. Learn from your mistakes: Your first attempt at a tantrum was scuppered by a know-it-all mother who fooled you into calming down? So what? Learn from your mistakes. Now that you know her tricks, you just have to repeat the performance and stick to your guns. She has been lulled into a false sense of security and believes the same tricks will work on you again. Oh no, think again lady! 

3. Repetition is key: Remember, tantrums are not your only weapon. Repetition of what parents consider unsuitable behaviour is a powerful tool. Climbing onto the kitchen table when no one is looking, emptying the cupboards of their contents, playing with the toilet brush - these are all examples of easy-to-perform activities which, if repeated often enough, will drive your parents to the levels of frustration you always hoped to achieve. 

4. Trust your instincts: Don't listen to the contant cries of "No" and "Don't do that!". Remember that you were born to be a toddler. It is a natural progression from babyhood. All that lying around in your pram wasn't a waste of time. It allowed you to gather information, to soak up the behaviour of the adults and children around you. It has allowed you to learn which buttons to push to get your way. Trust your instincts and go with what you feel. If you can get near a phone or tablet, disable it in some way. Your mind will guide you and let you know the exact combination of buttons to press to set it to a foreign language or turn the screen sideways. 

Following these guidelines will set you on the path to becoming the kind of toddler that other mothers gossip about. Goody two shoes pre-schoolers may even look to you for inspiration. But don't underestimate the amount of work involved. At first it may seem not to be worth it, but once you get a taste of getting your way, you won't regret having put in the effort. 

Life Love and Dirty Dishes

Thursday, 25 February 2016

Easy Peasy Easter Art for Toddlers

Toddlers love sticking their fingers into stuff and making a mess, so why not let them at it and make a bit of Easter art out of it? This is how easy it is.


You will need:
Paper
Paint
A small amount of water
At least one child
A waterproof fine point black marker pen

Step 1: Get out some paints (poster paints are good but even those little watercolur sets work too) and a little plastic cup of water. Put an apron or bib on your child to avoid them getting paint on their clothes when they inevitably wipe their hands on what they are wearing.

Step 2: Lay a few sheets of paper on the table. White or pastel colours show up the paint best, I find. 

Step 3: Have your child dip their index fingertip into the water then into the paint. If you are using poster paints it is a good idea to put a small amount onto a plate. If you are using watercolours, get the child to rub their wet finger on their chosen colour of paint until it is well coated with colour.

Step 4: Make fingerprints scattered all over the pages, reloading the fingers with fresh paint as needed.


Step 5: Leave the paint to dry. Wash the child's hands and put away the water and paints. 

Step 6:  For chicks - draw eyes, beaks and wings on the fingerprints
For bunnies - draw eyes, nose, mouth, ears and a fluffy tail on the fingerprints


Step 7: Now you can decide what to do with your little works of art. The ideas I like are:
- Hang the pages up as they are

- Cut out the best creatures and make Easter cards


 - Cut out some of your favourites and glue them to little paper bags. You can then fill these with chocolate eggs and give them as gifts at Easter. As an alternative, you can do the fingerprints straight onto the bag, as we did here:


Wednesday, 24 February 2016

Projektschmiede Second Hand Wonderland

Last Friday, in my 5 under €5 post, I mentioned my new favourite second hand shop. Anyone who is a regular reader will know that 
anything old is my kind of thing. So, finding a new place where I can look at and buy old stuff is always a good thing. 

Projektschmiede in Rothenburg ob der Tauber in Germany is not so much a shop as a warehouse. We have been in Rothenburg dozens of times over the past ten years but never noticed Projektschmiede until the weekend before last when we were in town to watch our nephew in a football tournament. 

Now, I am not a sports fan but I have never been happier to have been to a football match than I was that day! Having spotted the warehouse while stopped at the lights on the way to the sports hall, I waited till a gap in matches and snuck off with Number Three to check out Projektschmiede.


Before I even got in the door of the place, I was thrilled. Outside the entrance was shelf upon shelf of jars in all shapes and sizes. But when I turned around and saw all these plant pot holders arranged by colour, I knew I had found a special place.
  

Inside I was not disappointed. First of all, there was the building itself - huge arched windows letting in tons of natural light, a red brick vaulted ceiling and a maze of rooms. 


In the first couple of rooms the walls are lined with white shelving stacked with china and glassware of all kinds. From soup tureens to serving platters, sherry glasses to dinner plates, it is all there. 


I didn't buy this cute little tea set but I wish I had. €5! A steal.


There were more glasses than I have ever seen before in one place, and such pretty ones. I am definitely going to back. I simply could not decide which ones to buy.  


What I really liked about the place was that the staff seemed to enjoy working there and they cared about the way the goods were displayed. Just look at this coffee pot display. (I admit the photo is not the best, but I had a toddler struggling to get off my hip as I took it). 


The next room was bursting with furniture - a whole mix of stuff, a lot of it not my taste. But there were a few really nice pieces with potential - these wardrobes, a set of chairs with woven ratten backs (€24 each), a set of bedside lockers (€40 each).


There was even one room of toys, which included this gorgeous cot. It is actually a baby cot rather than a toy and, while the veneer was damaged in a few places, it had beautiful paintwork. €28 is all it cost. I had a difficult time not buying it, I can tell you. 


The book section was laid out like a library with aisles of shelves stuffed with books, sorted properly into categories. There was even a wood-burning stove lit to cosy the place up!

This bookshelf caught my eye. I can imagine that a few coats of chalk paint in a smokey blue-grey, it could be beautiful.


I am so pleased to have come across this place and am going to have to set aside a little budget for my next visit. 


Home Etc