Showing posts with label mirror. Show all posts

Wednesday, 17 February 2016

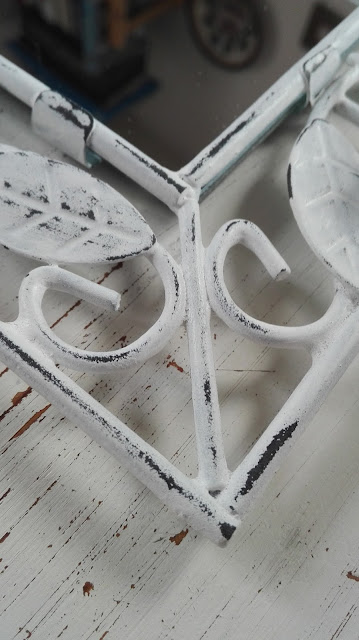
Upcycling A Metal Framed MIrror

Some time in the early 2000s, I bought what I considered at the time to be a pretty, metal-framed mirror with a candle holder at the front. I can no longer recall where I bought it or how much I paid. Several house moves later, it has found itself in the cellar, no longer a suitable match for any of our other belongings. 


A couple of times I almost donated it to the charity shop or brought it along to sell at a flea market. But something held me back. I thought I might spray it gold or change the beads. I just never had that aha moment.

That is, till now. Recently I signed up for a surprise parcel project. The other day I got the list of likes and dislikes of the person I am to send a parcel to. It turns out she likes shabby chic, white paint and crafts. 

After a little careful consideration, I decided to get my chalk paint out and see about giving the mirror frame a little makeover. It turned out to be incredibly quick and easy, but with a great result. Hopfully the lovely-sounding recipient will like it as much as I do. 


Step 1: Remove the mirror and wipe the frame clean to remove any dust or candle grease.


Step 2: Give the chalk paint a good stir and then apply one coat of paint to the front of the frame. Leave to dry. Rinse the paintbrush well.

Step 3: Apply one coat of paint to the back of the frame, being careful not to apply the paint too heavily. You want to avoid lumps and bumps of dried paint on the front. Leave to dry. Rinse the paintbrush well.

Step 4: Repeat step 2 and step 3 twice. It took at total of three coats of paint to cover the black metal frame completely.

Step 5: Using a small piece of medium grade sandpaper, sand the areas of the frame that would get most wear and tear. This will give the frame an aged, worn, shabby look. 

Stand back and look at the full piece a few times. Try to create a realistic pattern of wear, e.g. corners, edges, hinges would get most handing and would probably get worn sooner than the more decorative elements of the frame. 


Step 6: Dust the frame with a cotton cloth, such as a tea towel, to remove any dust from the sanding. 

Step 7: Polish the mirror and insert it into the frame.


Home Etc

Tuesday, 30 June 2015

How to Make a Window Mirror - An Upcycling Tutorial

I *may* have mentioned before that I have a thing for salvaging furniture. A few weeks ago I think I reached a new low. It was pouring rain and I should have been driving directly to Kindergarten so as not to be late.  But it was Sperrmuell day on part of your route. Sperrmuell is the German term for the  annual rubbish collection of furniture, electronic appliances and other oversized items. Basically anything one might normally throw into a skip is left on the footbath to be collected by the bin men. In short, my idea of heaven.

On this particular morning, I was in a rush but needed my fix of salvaging, now that I'd seen what day it was. Unfortunately there wasn't time for more than a quick glance. I spotted kitchen cabinets being dumped, stopped for a nosey and picked up this cabinet door. The glass was gone and it was soaked from the rain. But I thought I might be inspired to upcyce it into something. I love internal windows in houses. That was my starting point.

To cut a long story short, it became a mirror. You may have spotted it in last week's hall renovation post. Here is how I went about it.

Clean the window frame and sand it, if necessary. Thankfully mine didn't need sanding.
Paint with two coats of undercoat suitable for use on wood.
Paint with a top coat of the colour of your choice. I chose a pale cream in a satin finish.


Once I had the woodwork finished, I brough the frame to the DIY centre. I was between two minds as to how to proceed: mirror or photo frame. I tried it out with some passepartouts and it looked fine, but I preferred the idea of a mirror after I tried out both looks.

Luckily I was able to find a mirror in the correct size, but the DIY centre would have ordered one to the correct size if I had needed it. I used a special glass and mirror glue to fix the mirror to the frame.


The mirror now hangs in our hall and helps brighten the place up by reflecting the white of the stairs and wall opposite it. 


A couple of weeks after I had finished and hung my mirror I was shopping and spotted the mirror in the photo below. I couldn't help myself and had to look at the price tag on the back. €99! Mine cost me around €20 for the mirror, glue and hanging fixture I needed. I had the paints and brush already from other projects. But best of all, I had a great time working on it and that is priceless.


Home Etc